I have found that over the last 5 years of using Revit that one of the most effective ways of modelling in place is by doing so in a 3D Section box view. However, depending on the initial orientation of the model you want to create; it can be hard to model in a section box based on a section, if the view cube isn’t aligned to the section in the first place.
Here are a few simple steps to make sure that your view cube is correctly aligned to your model to make things much easier:
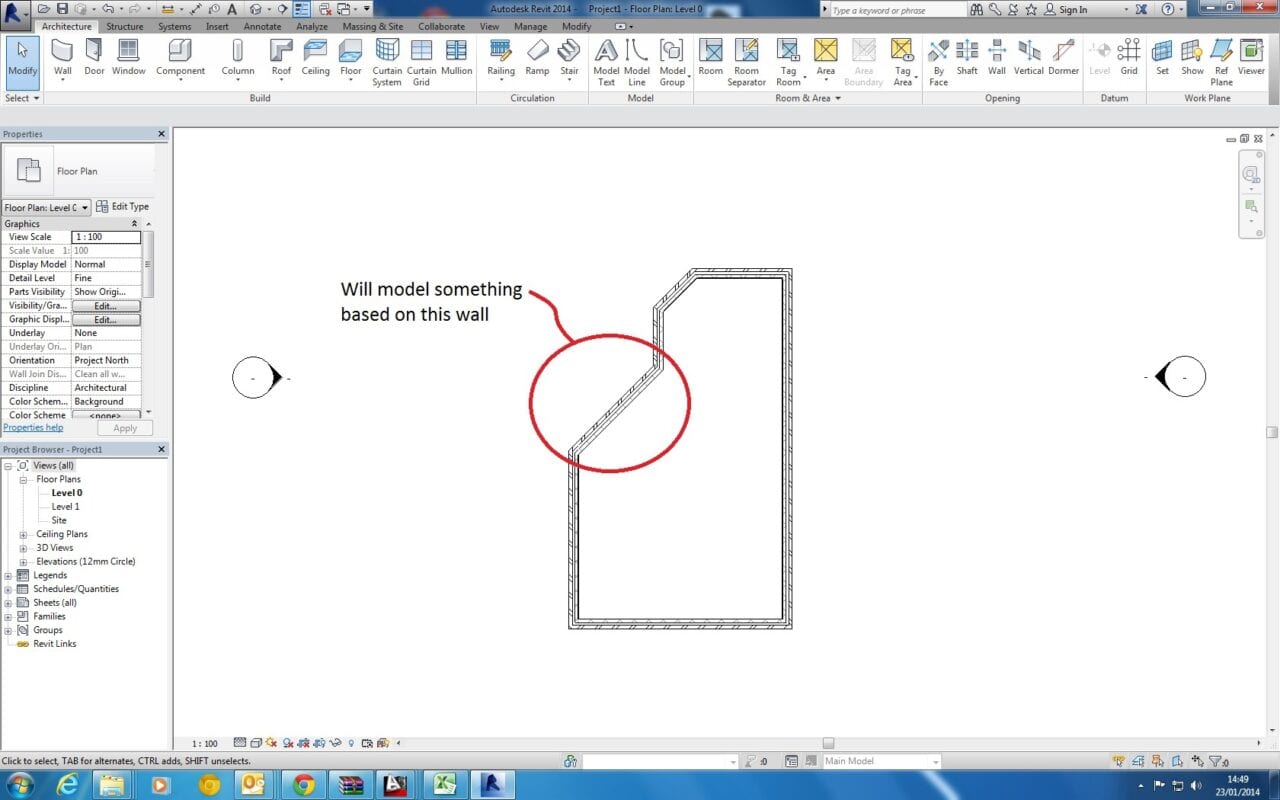
- Figure out where you want to create your model in place element and what orientation you want the view cube to have.

- Create an elevation view (View – Create – Elevation) and Section View (View – Create – Section) that is aligned to where you want the front face of the view cube to be aligned with.
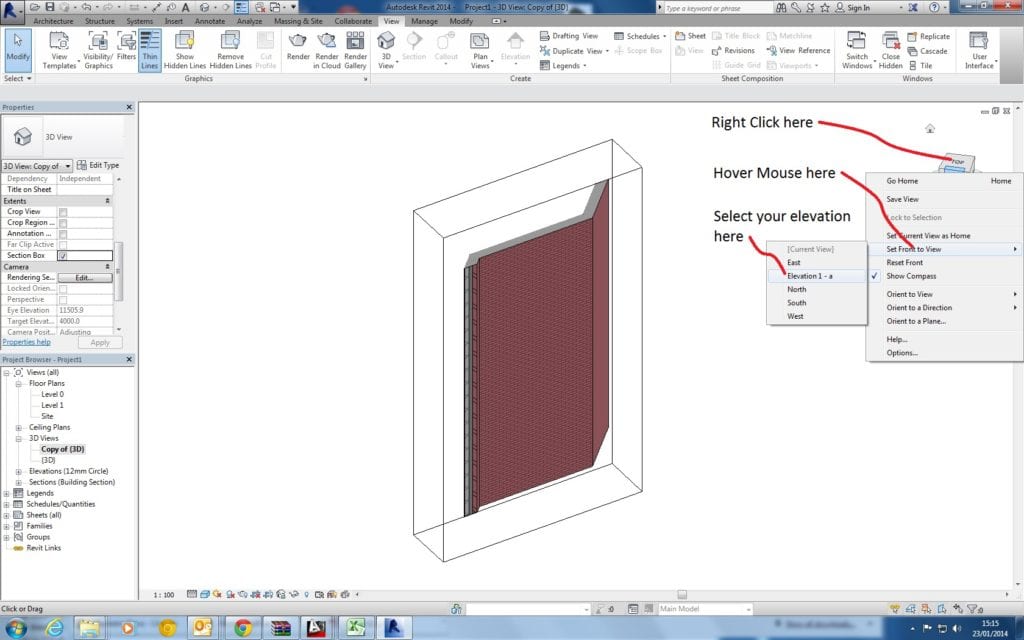
- Create a 3D view you want to use to create your model in place family, normally I right click on a standard 3D View and click duplicate, then turn on section box (under extents) in the views properties.
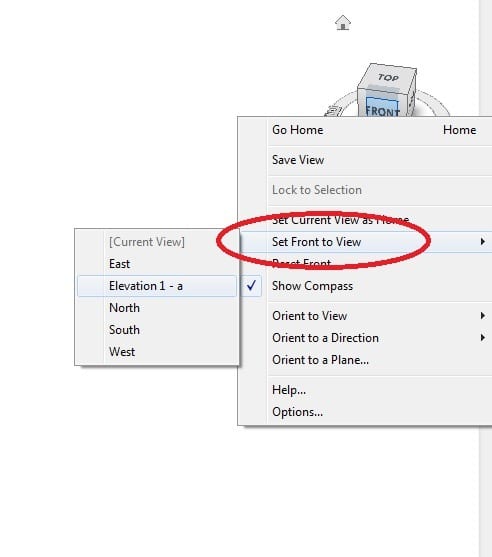
- Right click on your view cube and select “Orient to View” – then the section you created
- Right click on your view cube again and select “Set Front to View” – then pick the elevation you created.
- Now you can use the view cube to orientate around your model as desired, while knowing that if you snap to one of the default views (Front, Back, Left, Right, Top and Bottom) that your view will be perfectly perpendicular to your model face; making it much easier to sketch for extrusions, sweeps etc.


Hopefully you find this tip useful, I know it’s saved my colleagues a lot of effort in having to create multiple sections and work planes.